Prerequisites:
How to add custom packages
How to add custom textures
Overview:
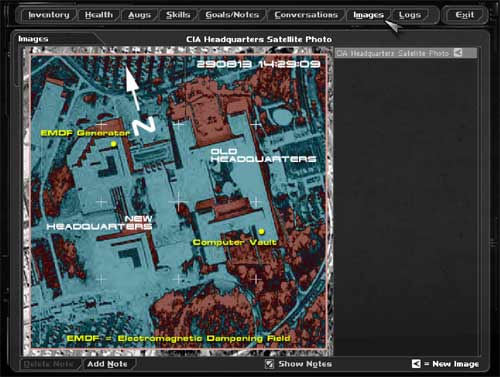
So you want have some of those DataVault images in your map? Read on.
The first step is to actually create the image. It might be a floor plan of your level, or it might just be some "flavor", like a photo of a character you are supposed to meet. Make it a 400 x 400 image in Photoshop or whatever your favorite image editor is. For now, sticking with 24-bit color will work out the best.
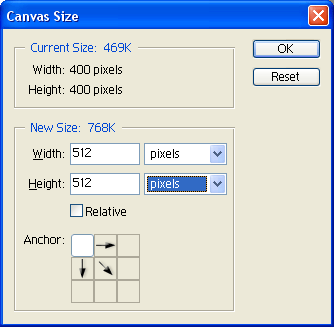
At some point, you'll need to "pad" the right and bottom of the image to 512 x 512 pixels (sticking with black for the extraneous area would be a good idea). In Photoshop that is easily done by using the Canvas Size option. That will look something like this in Photoshop:
Now you'll need to convert the entire image to 8-bit color. You can use your image editor to do that, but I highly recommend you use the Bright utility or the Bright Photoshop plug-in. The reason you want to convert to 8-bit before the next step, is so that all four of your images end up with the same color palette. That's important for the DataVault image to look right.
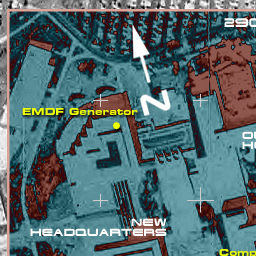
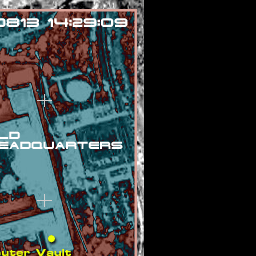
Now you'll need to do some cropping in your image editor. How exactly you do this step is up to you, but one approach would be to pull up four copies of your converted 512 x 512 image and crop four 256 x 256 images from that. What you'll end up with is four images that look something like this:
|
Image_HQ_1.pcx
|
Image_HQ_2.pcx
|
 |
 |
 |
 |
|
Image_HQ_3.pcx
|
Image_HQ_4.pcx
|
It's not strictly necessary, but it's a good idea to keep the filenames the same, but numbered in sequence, as shown above.
As you might have guessed, you *will* need to import these textures into an Unreal package for them to show up. If you need more info on that, see How to add custom textures.
NOTE: You don't need to generate MIP-maps for these textures, since they will be only used in the 2D user interface.
Now don't freak out, but you'll have to do a little typing in Notepad here. Since you've followed the prerequisites, you already know how to set up custom packages and classes, so it shouldn't be a problem. Create a new text file under your package folder's Classes folder, and call it Image_HQ.uc (or whatever you want, if you know what you're doing).
Type this in, where "MyPackage" is the name of your package, and the texture names correspond to what you called them when you imported them in Step 3. (these are not filenames, but the names in your texture package or .u package)
//=============================================================================
// Image_HQ
//=============================================================================
class Image_HQ expands DataVaultImage;
defaultproperties
{
imageTextures(0)=Texture'MyPackage.Image_HQ_1'
imageTextures(1)=Texture'MyPackage.Image_HQ_2'
imageTextures(2)=Texture'MyPackage.Image_HQ_3'
imageTextures(3)=Texture'MyPackage.Image_HQ_4'
imageDescription="CIA Headquarters Satellite Photo"
colNoteTextNormal=(R=50,G=50)
colNoteTextFocus=(R=0,G=0)
colNoteBackground=(R=32,G=32)
}
imageTextures(0) through imageTextures(3) correspond to the four images that make up a complete DataVault image. They are from left to right, then top to bottom. The imageDescription will be visible to the player in various parts of the interface, so call it something appropriate.
Save your map and exit UnrealEd. Run "ucc make" and build your package. Remember to first delete your current .u file if you've previously built it.
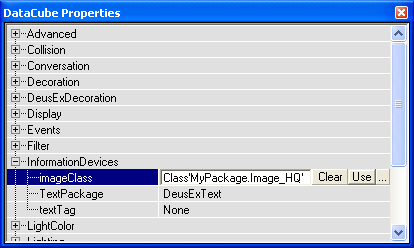
The easiest way to test out your DataVault image is by using a DataCube. Add a DataCube to your map, and set its InformationDevices -> imageClass to your new DataVault image class name. To avoid making a typo, expand Inventory -> DataVaultImage in the Class browser, select your custom image class, go back to the imageClass property in the DataCube, and hit the Use button. Or just type it in as shown here:
IMPORTANT: You can use the Transfer Object event in ConEdit to transfer DataVault images from the original game to the player, but NOT custom ones. There is a major limitation in ConEdit that prevents items from custom packages from being used. I made a custom trigger that I use to get around that for DataVault images. If you ask me nicely, I'll probably send it to you. :)
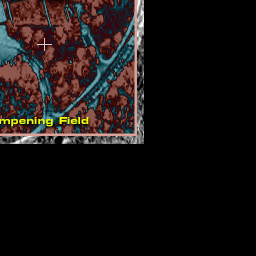
Now try it out. Right-click on your DataCube and the image should transfer. Pull up your Images screen. That's it!